1. Create your account
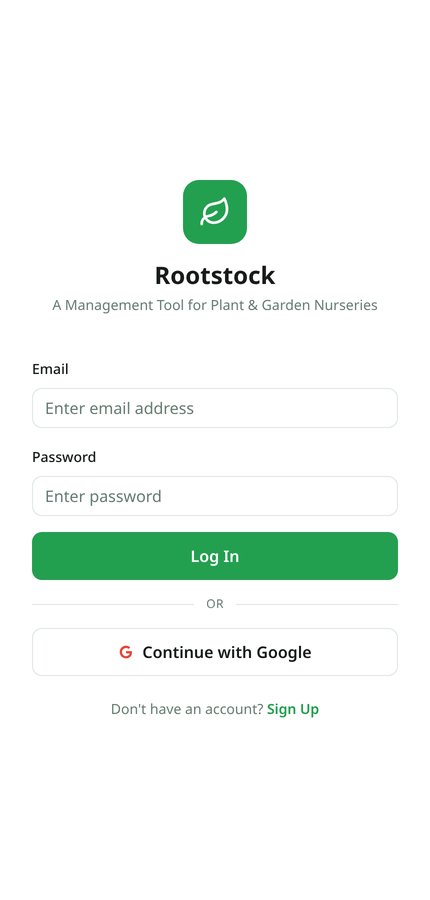
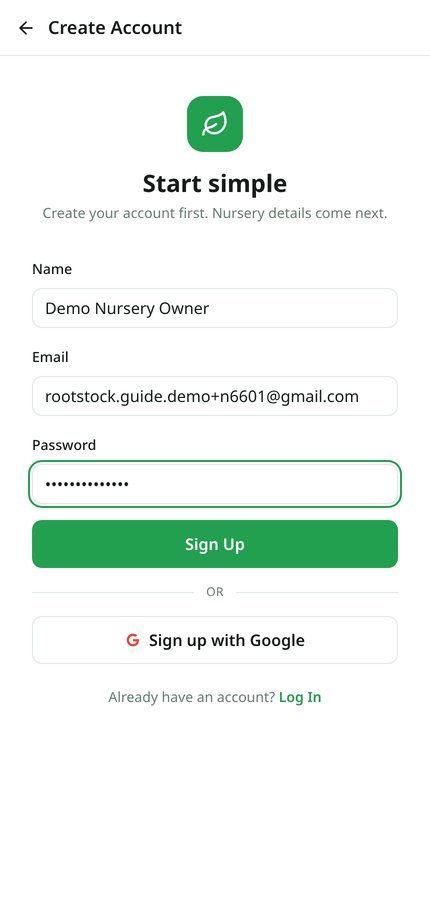
Open Rootstock and tap Sign Up, or use Continue with Google for the fastest start. Signing up only needs your name, email and a password — nursery details come in the next step.
2. Set up your nursery
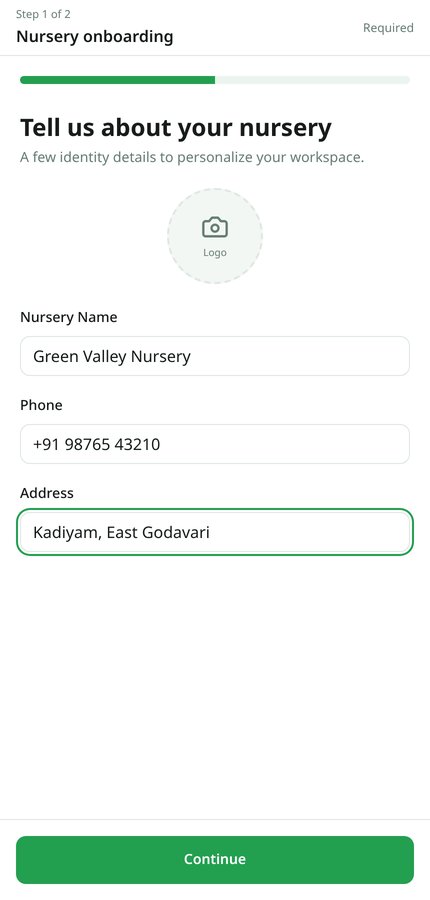
The setup wizard asks for your nursery name, phone and address, then how your growing space is organised. If you keep things simple, choose one growing area and skip beds — you can always add zones and beds later from your profile.
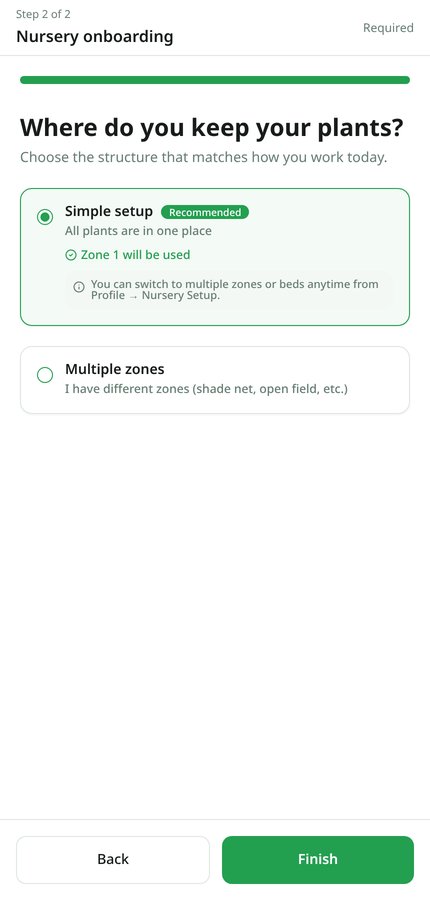
Tip: zones and beds are only used to record where plants sit. If you don't track locations, one zone with no beds is perfectly fine.
3. The home dashboard
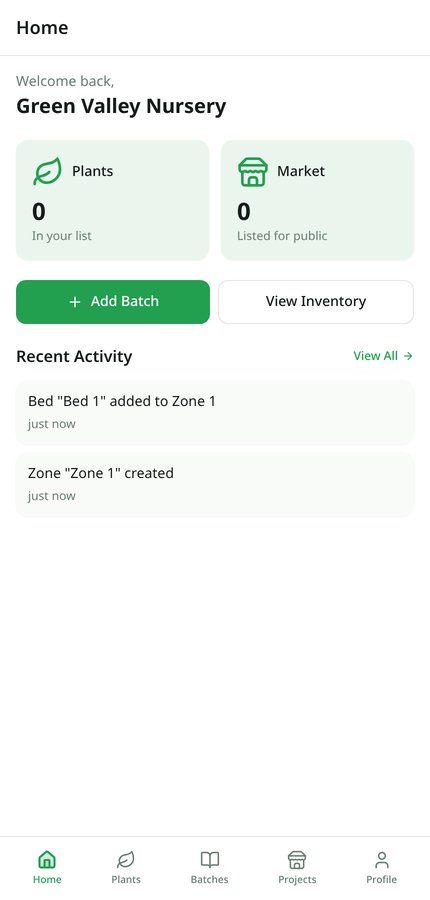
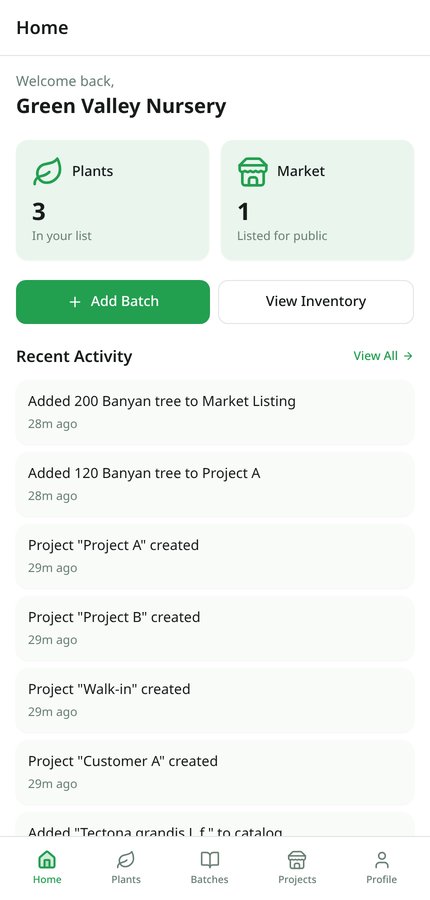
Home gives you the daily picture: total plants in production, how many are ready to dispatch, and quick cards for your plants, batches and market listings. View inventory opens the spreadsheet-style summary, and the Market card jumps straight to your public listings.
4. Build your plant list
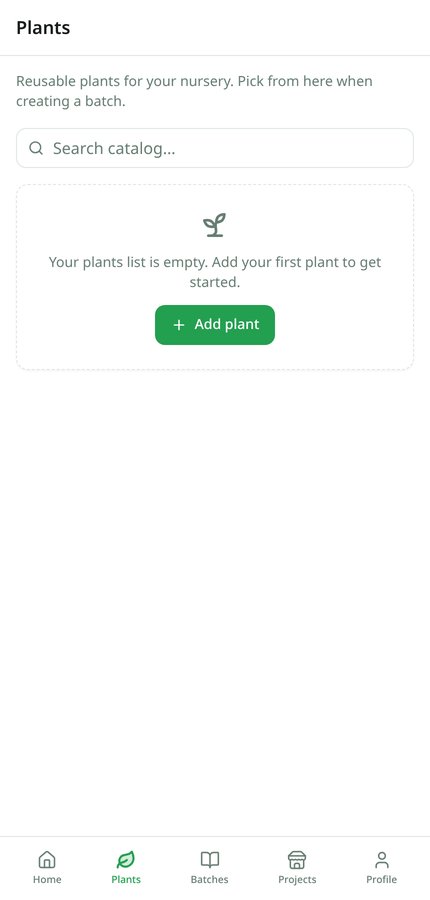
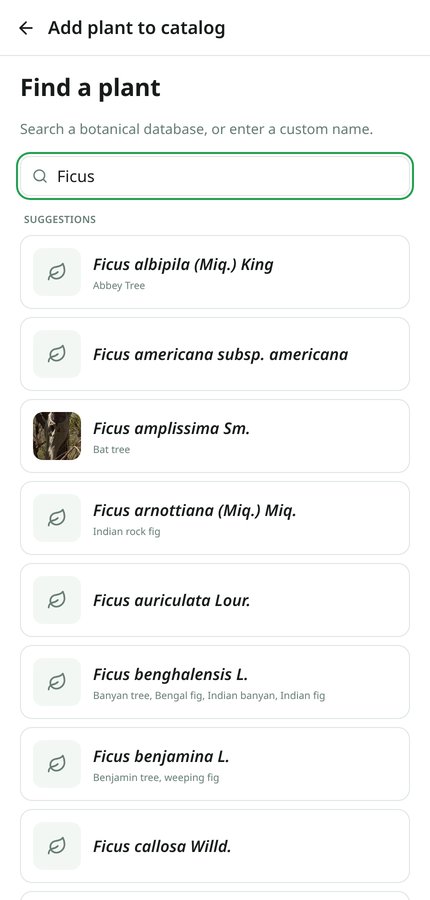
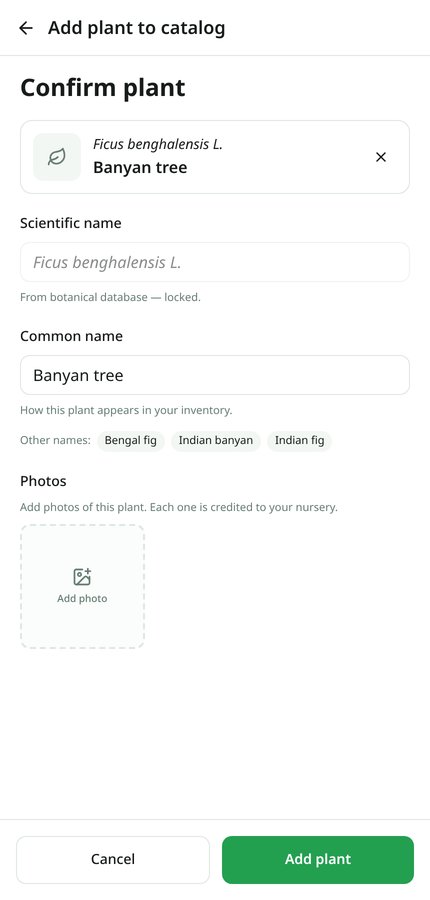
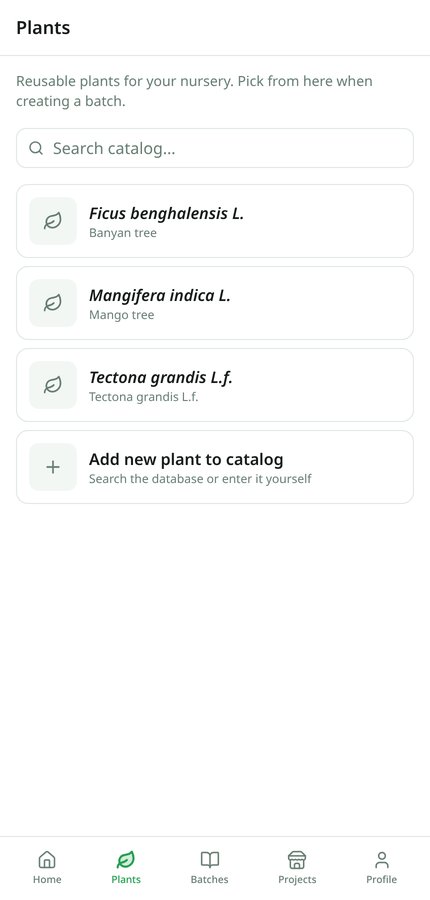
The Plants tab is your own catalogue. Tap + to add one, then search the built-in plant database by scientific or common name. Pick a match and the form fills in for you; the scientific name stays locked for database plants while you're free to edit the common name to whatever your buyers call it. Nothing in the database? Use Add custom plant and type it yourself.
5. Your growth workflow
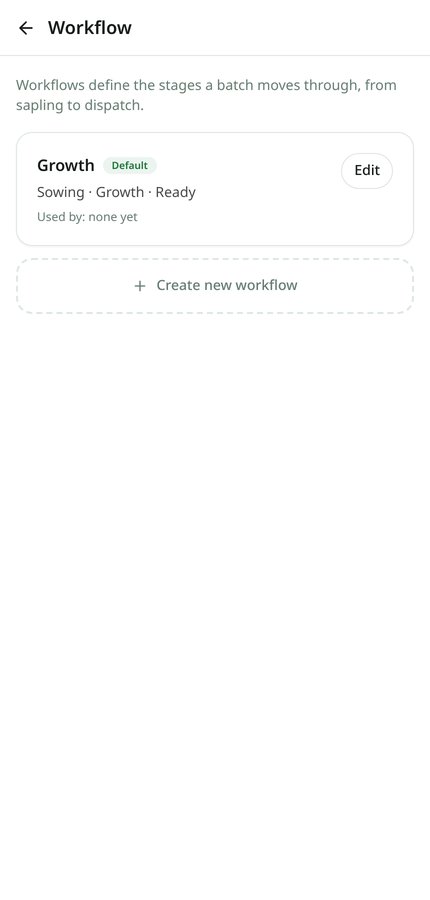
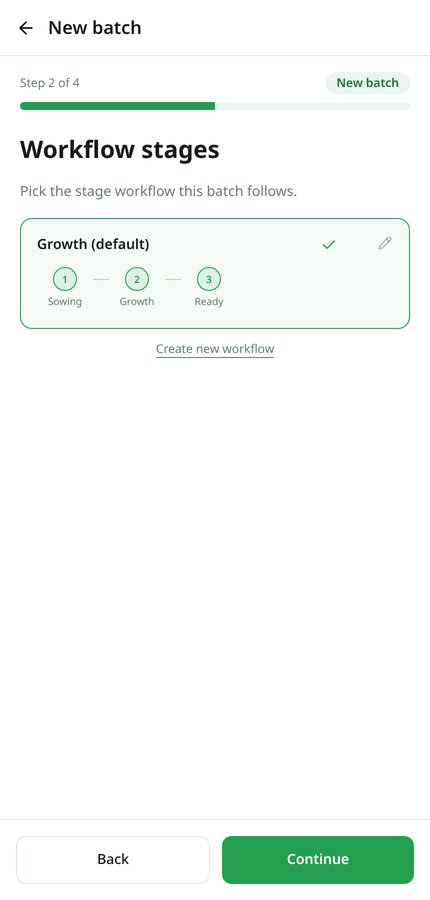
A workflow is the list of stages your plants pass through. Every nursery starts with a default Growth workflow: Sowing → Growth → Ready. Open Profile → Workflow to rename stages, add your own (Seedling, Sapling, 1L bag, Hardening…) or create a second workflow for a different crop. The final Ready stage is fixed, because that's what feeds your dispatch and sales numbers.
Editing a workflow that already has live batches creates a new version, so your history stays accurate. Older batches keep running on the version they started with, and you can migrate them when you're ready.
6. Start a batch
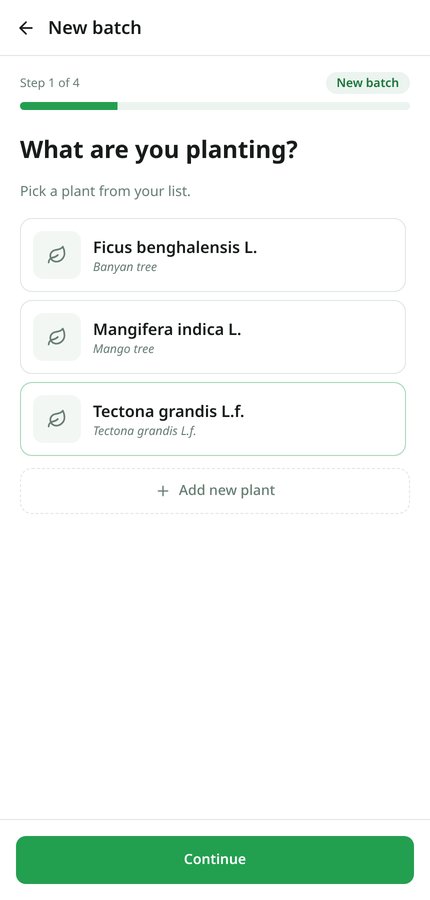
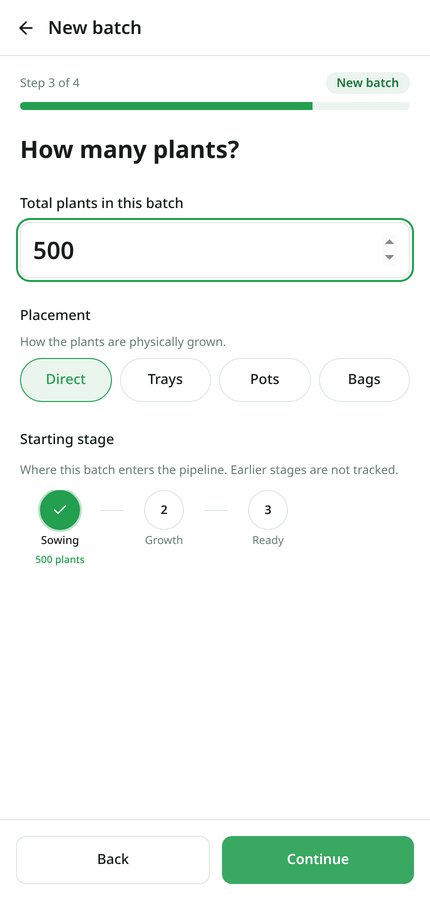
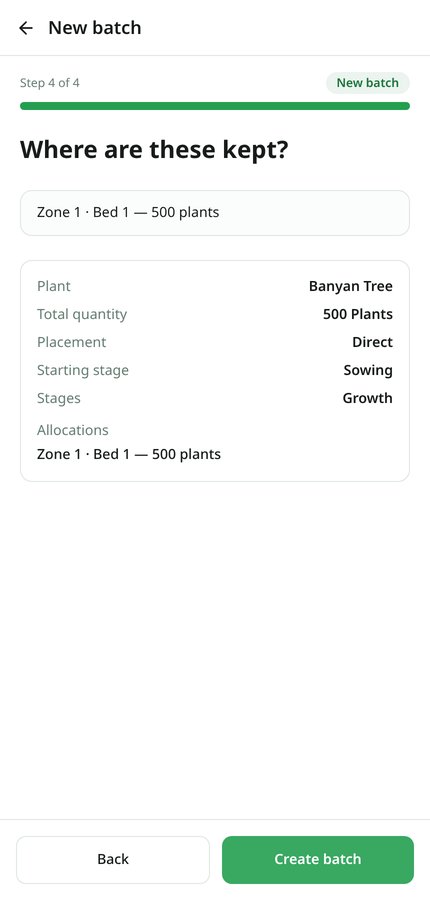
A batch is one group of plants you started together. From Batches → +, the wizard takes four short steps:
- Pick the plant — search your catalogue, or add a new plant on the spot.
- Pick the workflow — each card previews its stages as a mini funnel.
- Quantity & location — how many you started, and where they sit.
- Review — confirm and create the batch.
7. Move plants through stages
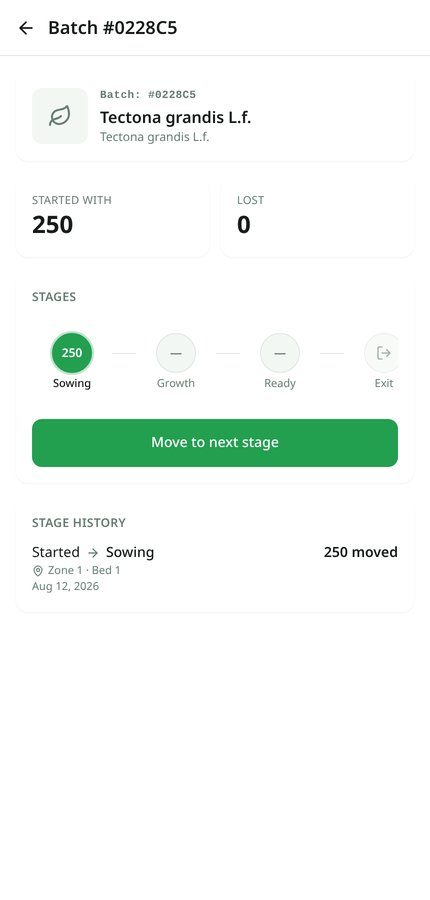
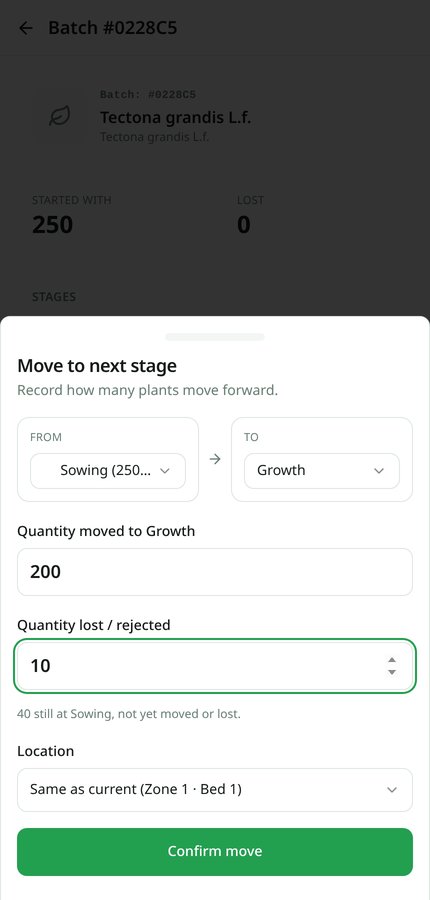
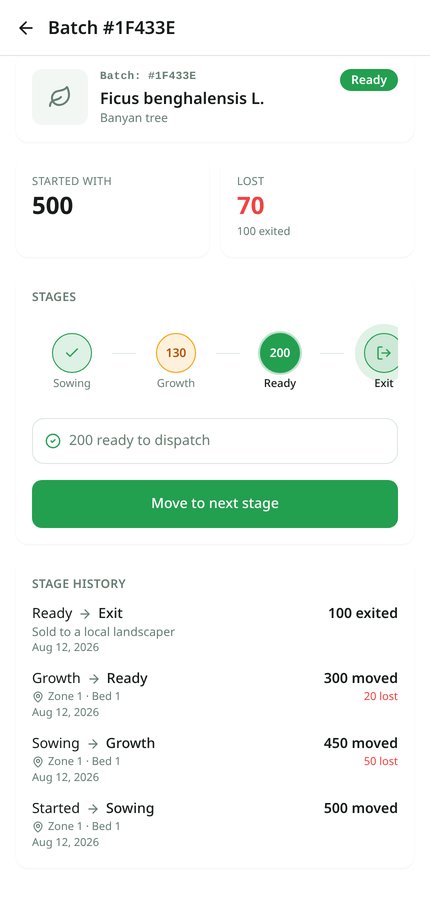
Open a batch to see its funnel: how many plants sit in each stage, how many were lost, and the full history. Tap Move to next stage, choose the from and to stages, enter how many moved and how many were lost, and pick the destination location (keep Same as current to leave them put). You can move in parts — 20 today, 30 next week — and each move is timestamped for you.
8. Exit plants from a batch
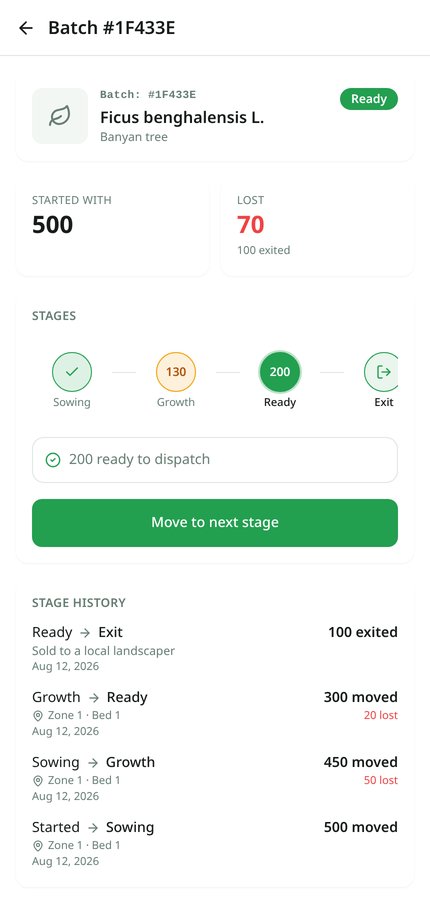
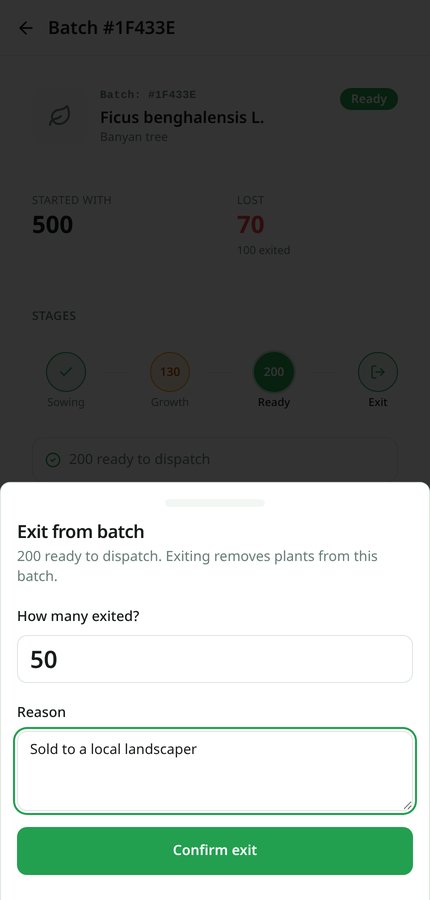
When plants leave the nursery — sold, dispatched, gifted — use the Exit circle at the end of the funnel. It only becomes tappable (with a gentle pulse) once something is ready to dispatch. Enter the count and a short reason; Rootstock reduces the ready number and records the exit in the batch history.
9. The batches screen
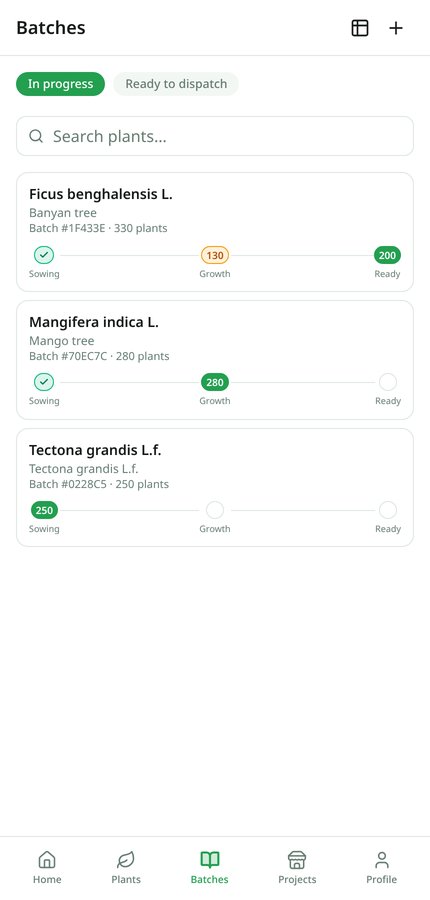
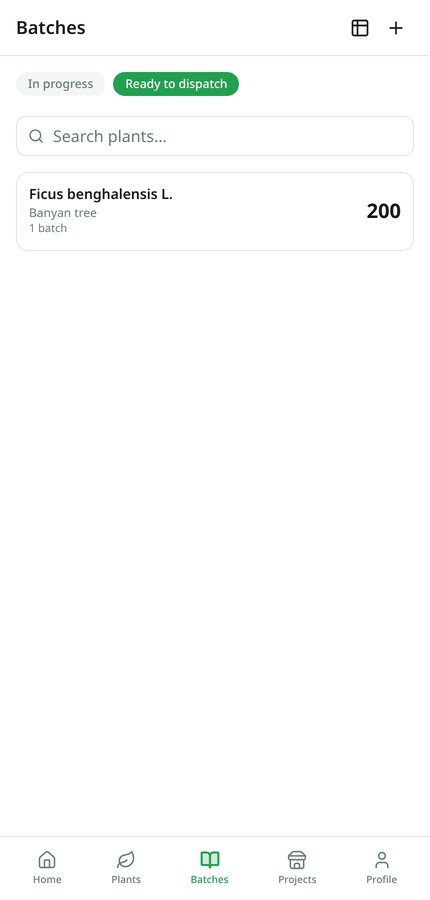
In progress lists every live batch with its id, total quantity and a compact stage funnel, so you can see at a glance where each group is. Ready to dispatch switches to one row per plant, totalled across batches — the number you quote a buyer. Tap a row to jump into the batch. Use the search bar to find a plant, and the table icon in the top bar to open the inventory sheet.
10. Inventory sheet
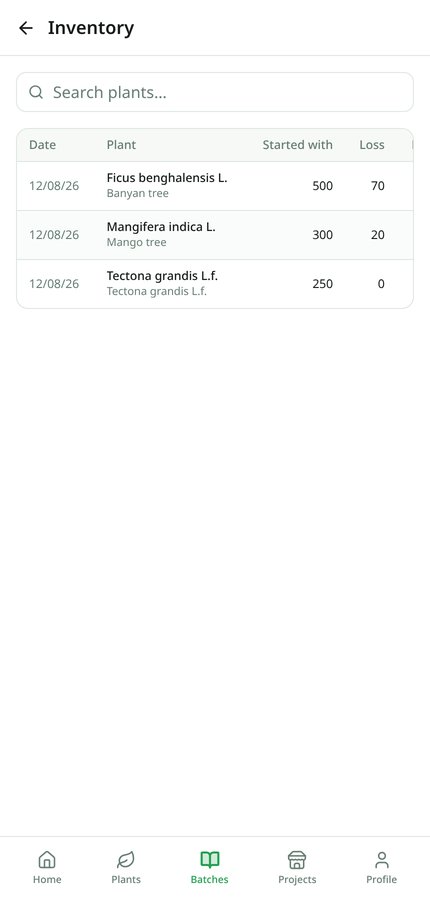
The inventory sheet is the spreadsheet view of your nursery: one row per batch with the start date, plant, started with, loss, ready, exit and status. A batch reads completed once everything it started with has been accounted for. Reach it from View inventory on Home or the table icon on Batches.
11. Projects & customers
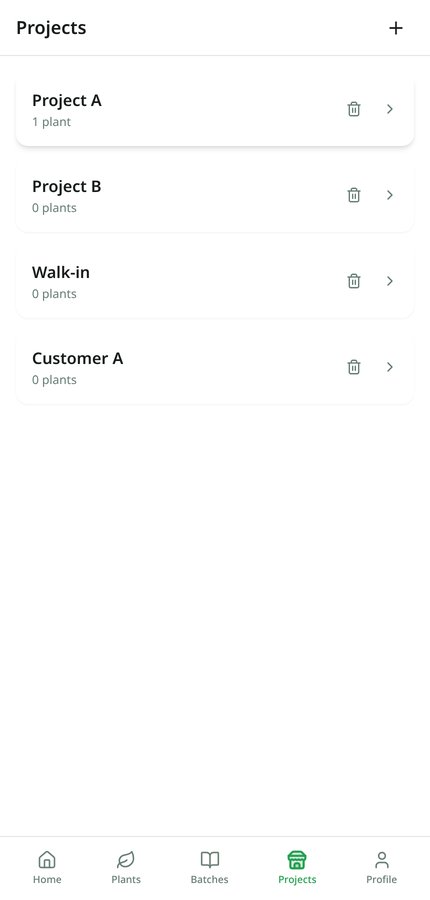
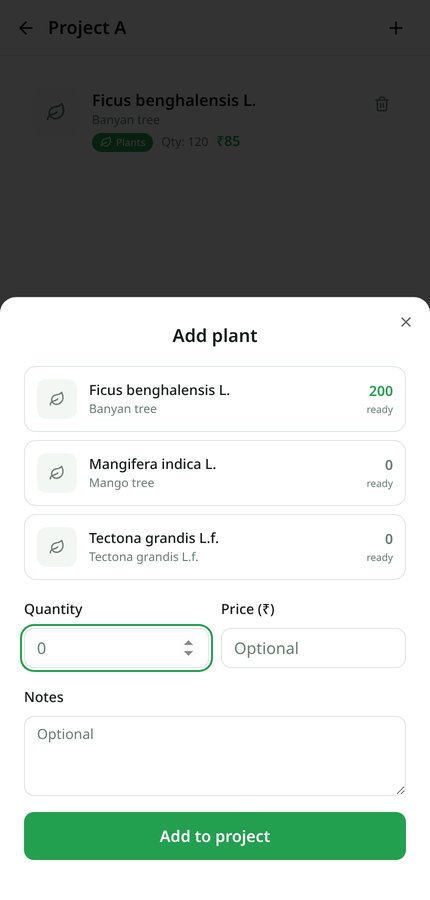
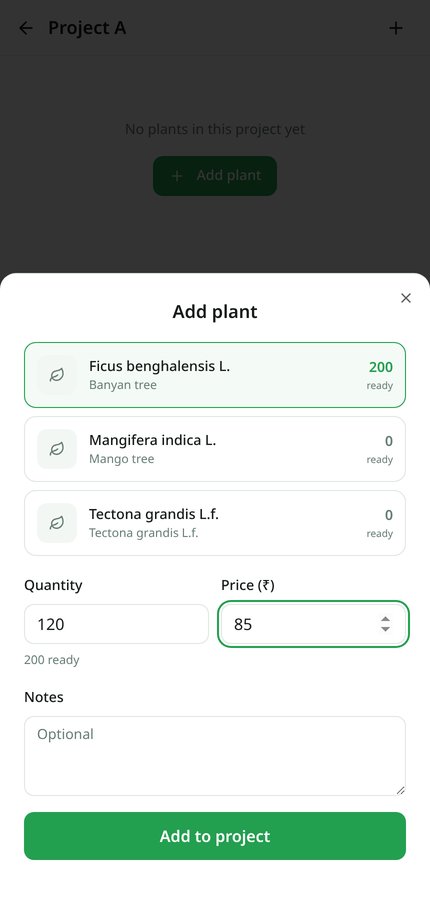
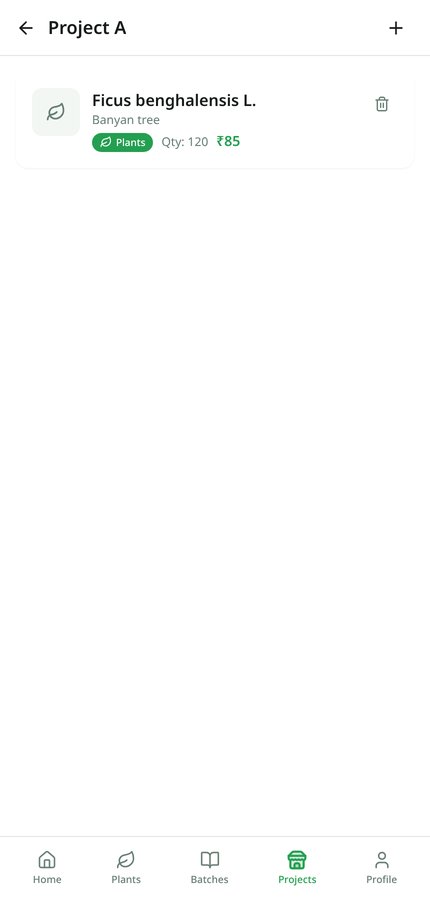
Projects are how you set plants aside — for a landscaping job, a wholesale buyer or a walk-in customer. Every nursery starts with Project A, Project B, Walk-in and Customer A; rename them or add your own. Inside a project, tap Add plant, pick from your catalogue — the number on the right shows how many of that plant are ready and unassigned — then enter quantity, an optional price and notes.
12. Market listings
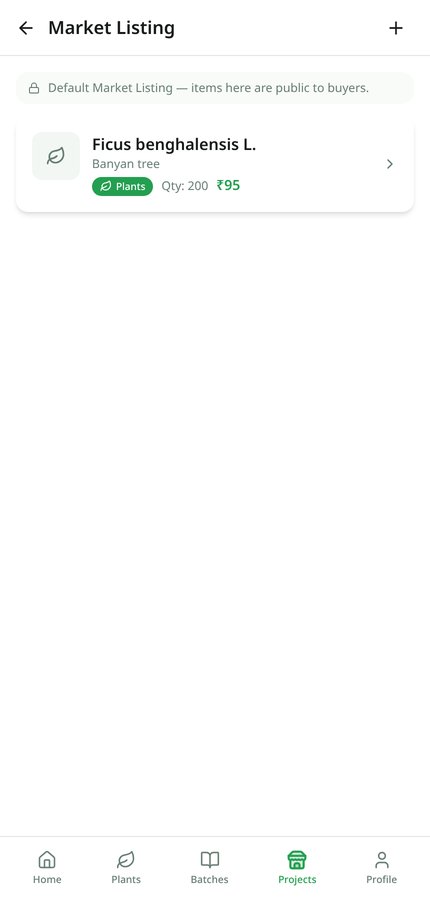
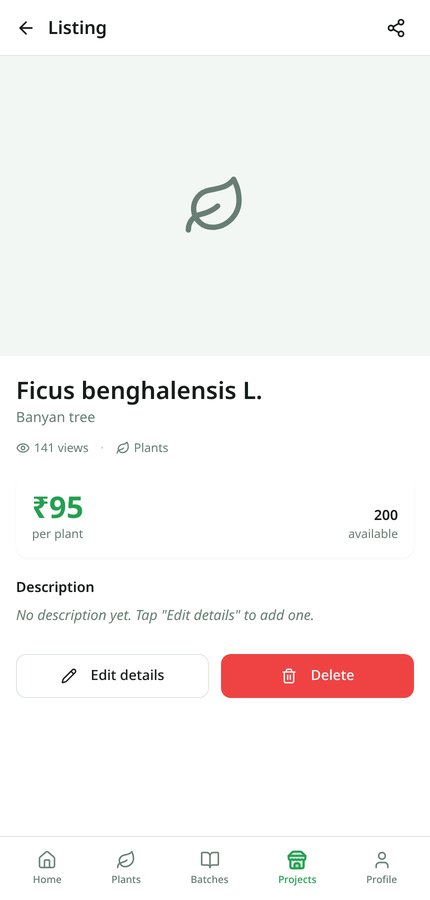
Tap the Market card on Home to open your public listings. Add plants exactly like a project — plant, quantity, price. Each listing has its own page with photos, price per plant, availability, view count and a share button. Photos and details are pulled from the plant database when available; use Edit details to add your own description, price or image links.
13. Profile & settings
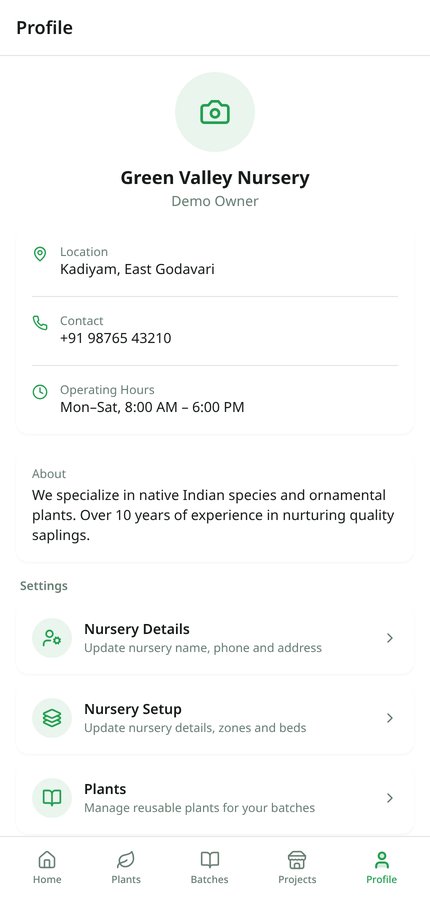
From Profile you can edit your personal details, update nursery information, manage zones and beds, open Workflow settings, log out, or permanently delete your account and all of its data.
FAQ
Can I install Rootstock like an app?
Yes. Open it in your phone browser and choose “Add to Home screen”. It then runs full-screen, like any other app.
What if I don't use zones or beds?
Keep one growing area with no beds. Rootstock will stop asking about locations and simply record the quantities.
Can I move only part of a batch to the next stage?
Yes — move any number, any time. You can also choose which stage you're moving from, so partial and repeated moves are fine.
What's the difference between a project and a market listing?
A project reserves plants for a specific job or customer. A market listing is public — it's what buyers see on the marketplace.
Do I lose history if I change my workflow?
No. Changing a workflow that's in use creates a new version; running batches keep their original stages until you migrate them.
Ready to go paperless?
Set up your nursery in a couple of minutes and start your first batch today.
Open Rootstock